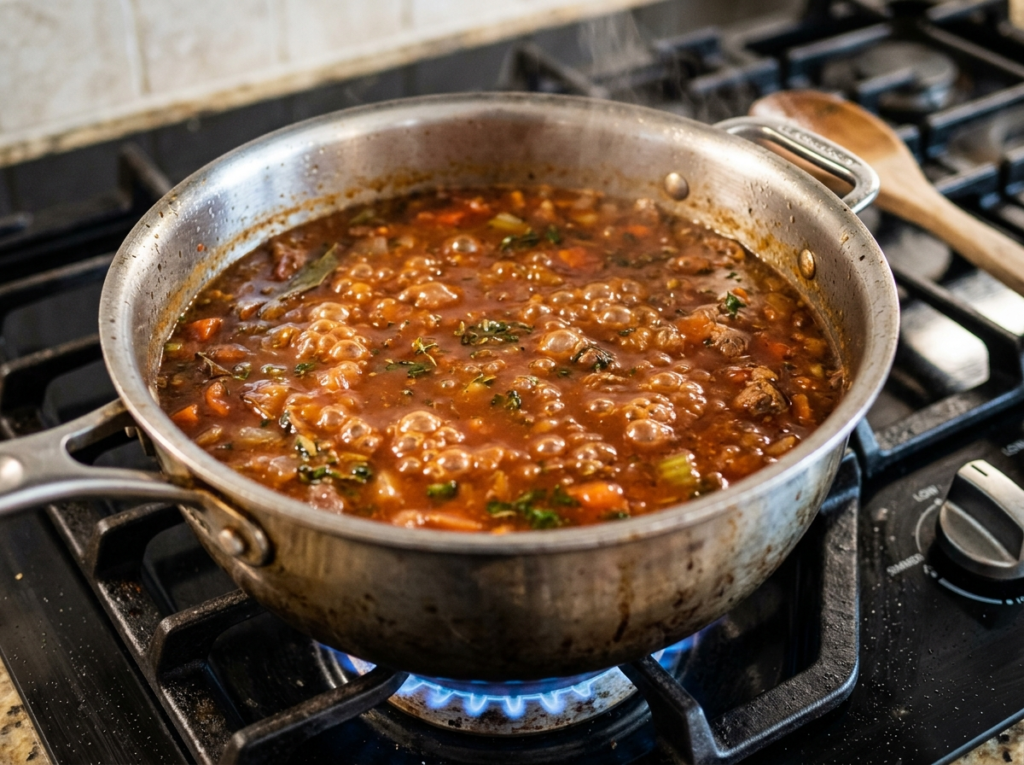
A recipe tells you to “bring it to a simmer,” and you stare at the pot wondering: what does that actually look like? You’re not alone. The difference between a simmer and a boil might seem small, but getting it wrong can turn a tender braise into a tough, dried-out mess — or leave your soup watery and flavorless. Knowing the right simmer temperature on the stove gives you control over your cooking, and it’s simpler than you think.
A simmer happens between 180°F and 205°F (82°C to 96°C). That’s below a full rolling boil (212°F / 100°C at sea level) but well above a warm hold. You’ll see gentle bubbles rising lazily to the surface — maybe one or two every second or so — rather than the aggressive, churning action of a boil. Most stoves achieve this on a low to medium-low burner setting, though the exact dial position varies depending on your stove, your cookware, and even your altitude.
Let’s break all of that down so you feel confident the next time a recipe says “simmer.”
What Simmering Actually Means
Simmering is a controlled, gentle form of cooking in liquid. Think of it as boiling’s calmer, more patient sibling. Where boiling is loud and violent — big bubbles crashing at the surface — simmering is quiet. Small bubbles form on the bottom of the pot and rise slowly. The surface of the liquid moves gently, almost like it’s breathing.
Why does this matter? Because that gentleness is the whole point. A hard boil agitates food too much. It can break apart delicate ingredients, make proteins tough and stringy, and cause liquids to evaporate too fast. Simmering lets flavors meld slowly. It keeps meats tender. It gives starches time to thicken sauces without scorching.
If you’ve ever made a pot of soup that tasted flat even though you followed the recipe, there’s a decent chance you were boiling when you should’ve been simmering. The aggressive heat drove off volatile aromatic compounds — the stuff that actually makes food smell and taste great — before they had a chance to settle into the broth.
The Exact Temperature Range for Simmering
Let’s put some real numbers to it. The temperature range for simmering sits between 180°F and 205°F (82°C and 96°C), and within that range, there are actually a few distinct zones worth knowing about.
Low simmer (180°F–190°F / 82°C–88°C): Barely any movement in the pot. You might see a tiny bubble break the surface every few seconds. This is what you want for stocks, delicate fish, or custard-based sauces where you’re trying to avoid any disruption. Some cooks call this a “lazy simmer.”
Standard simmer (190°F–200°F / 88°C–93°C): A steady but gentle stream of small bubbles. The surface ripples slightly. This is your workhorse temperature for soups, stews, beans, grains, and braises. Most recipes mean this when they say “simmer.”
Active simmer (200°F–205°F / 93°C–96°C): More bubbles, a bit more movement, but still not a full boil. You’ll use this for reducing sauces quickly or for pasta water just before you crank it up to a boil. Some people call this a “brisk simmer.”
Quick fact: Water boils at 212°F (100°C) at sea level. If you live at higher elevations — say Denver at around 5,280 feet — water boils at about 202°F. That means your simmer range shifts downward slightly too, which is something to keep in mind if mountain recipes seem to take longer than expected.
You don’t need a thermometer clipped to your pot every time you cook, though using one a few times will help you calibrate your eyes. After a while, you’ll recognize what a simmer looks like in your specific pots on your specific stove without thinking twice.
What Burner Setting to Use
Here’s where things get a little tricky, because no two stoves are the same. A “medium-low” setting on a gas range might behave totally differently from “medium-low” on an electric coil or a glass-top induction stove.
That said, here are some general starting points.
Gas stoves give you the most responsive control. You can usually see the flame and adjust instantly. For a standard simmer, set the burner so the flame just barely licks the bottom of the pot. If the flame is dancing up the sides, you’re too high. Most gas stoves simmer well between the low and medium-low marks — roughly the 2 to 3 range on a dial that goes to 10.
Electric coil stoves are slower to respond. They hold heat even after you turn the dial down, which can make fine-tuning annoying. A good trick: once you hit a boil, turn the dial down to between 2 and 4 and then wait a couple of minutes for the coil to cool before judging. If your liquid is still boiling aggressively after two minutes, nudge it down again. Some experienced cooks keep a second burner preheated on low and simply move the pot over, which sidesteps the lag entirely.
Induction stoves are precise and responsive like gas, but the power output can vary a lot between brands. Most induction cooktops simmer well on a low to medium-low power setting. Because induction heats the pan directly (not the air around it), you’ll often find that the simmer stays more stable once you dial it in.
Glass-top (radiant) electric stoves behave similarly to coil stoves but with slightly faster response times. Start at a 3 or 4 setting, adjust after a minute, and watch the pot rather than the dial.
Pro tip: The size and material of your cookware matters too. A thin stainless steel pot transfers heat quickly and can go from simmer to boil in seconds if you’re not paying attention. A heavy cast-iron Dutch oven or enameled pot holds heat steadily and gives you a more forgiving simmer — that’s one reason Dutch ovens are a go-to for braises and stews. If you’re making something like Chinese char siu pork or Korean short ribs (kalbi), a heavier pot keeps the temperature consistent during long, slow cooking.
Simmer vs. Boil vs. Poach — What’s the Difference?
These three terms show up in recipes constantly, and they’re often confused. The differences come down to temperature and bubble activity.
Poaching happens at the lowest end of the spectrum — roughly 160°F to 180°F (71°C to 82°C). There are virtually no bubbles. The surface of the liquid barely moves. You’d poach eggs, delicate fish fillets, or chicken breasts you want to keep moist and tender.
Simmering sits in the middle at 180°F to 205°F. Gentle, steady bubbles. This is where most slow-cooked dishes live — soups, sauces, stews, grains.
Boiling is 212°F (100°C) at sea level, with big, rolling, vigorous bubbles. You boil water for pasta, blanch vegetables, or cook dumplings. You rarely want to boil a sauce or a piece of meat for an extended period because the aggressive heat damages texture and flavor.
Here’s a common mistake: a recipe says “bring to a boil, then reduce to a simmer.” A lot of home cooks bring the liquid to a boil but then only turn the heat down a tiny bit, leaving it at a vigorous, bubbling state that’s technically still a boil. That extra 7 to 10 degrees makes a real difference. Take it down until those big, crashing bubbles calm into small, gentle ones. Your food will thank you.
Why Simmering Matters for Different Foods
Different dishes need simmering for different reasons, and understanding the “why” makes you a better cook, not just someone following instructions.
Soups and Stocks
Stock is one of the best examples of why simmering matters. A good chicken stock, beef stock, or bone broth should simmer — not boil — for hours. Here’s why: boiling causes fat, impurities, and proteins to emulsify into the liquid, making it cloudy and greasy. A gentle simmer lets those impurities float to the surface where you can skim them off. The result is a clear, clean-tasting stock with deep flavor.
If you’re making a broth-based soup or even a ramen base like ajitsuke kikurage ramen, holding a steady simmer gives you a much better end product.
Sauces and Gravies
Simmering reduces sauces slowly, concentrating flavors without burning the bottom of the pan. A full boil causes splattering, uneven reduction, and can break emulsified sauces like cream sauces or pan gravies. A lot of Asian sauces — including those made with Chinese cooking wine — develop their best flavor at a simmer because the alcohol cooks off gently while aromatic compounds stay intact.
Braised Meats
Braising is essentially cooking tough cuts of meat in liquid at a simmer for a long time. The low, steady heat slowly breaks down collagen (the tough connective tissue) into gelatin, which is what makes braised meat fall-apart tender and gives the sauce that rich, silky body. If you boil a braise, the outside of the meat overcooks and squeezes out moisture before the inside has a chance to become tender. The result? Dry, stringy meat swimming in what should’ve been a great sauce.
This applies to dishes like Vietnamese caramelized pork, where slow simmering in a caramel-fish sauce mixture turns pork shoulder into something almost impossibly tender.
Grains and Rice
Rice, quinoa, oats, and other grains cook best at a simmer. Boiling rice too aggressively causes the outer starch layer to burst and slough off, making the grains gummy and sticky in a bad way. A gentle simmer lets each grain absorb water evenly and cook through without falling apart. If you’ve ever wondered why your jasmine rice turns out mushy, too much heat is a likely culprit.
Beans and Legumes
Dried beans need a long, gentle simmer to cook evenly. Boiling them causes the skins to split and the outsides to turn mushy while the insides stay chalky. A steady simmer at around 190°F–200°F gives you creamy, intact beans with a nice bite.
How to Tell If You’re Simmering (Without a Thermometer)
Most experienced cooks don’t use a thermometer for simmering — they use their eyes and ears.
Look at the bubbles. For a standard simmer, you should see small bubbles breaking the surface steadily but gently. They should rise from the bottom of the pot, not just appear at the edges. If you see only a few tiny bubbles clinging to the sides of the pot, you’re closer to a poach. If the whole surface is churning and rolling, you’ve crossed into a boil.
Listen. A simmer has a quiet, almost whispering sound. A boil is noisy — you can hear it from across the kitchen. If your pot sounds like it’s angry, turn it down.
Watch the steam. A simmer produces gentle wisps of steam. A boil produces a lot of steam quickly. If your glasses fog up when you lean over the pot, you’re probably boiling.
Check the lid. If you’re cooking with a lid and it’s rattling or bouncing, you’re boiling, not simmering. A simmering pot with a lid stays quiet. Some cooks leave the lid slightly ajar during a simmer to allow steam to escape and prevent the temperature from creeping up.
Did you know? The French culinary term for a very low simmer is frémir, which literally means “to tremble.” That’s a perfect description — the surface of the liquid should tremble, not thrash.
Adjusting Your Simmer Based on What You’re Cooking
Not every simmer is the same, and experienced cooks adjust the intensity based on the dish. Here’s how to think about it.
If you’re reducing a sauce, you want a slightly more active simmer — closer to 200°F–205°F — because you need steam to carry away moisture. A lazy simmer will reduce a sauce too, but it’ll take much longer.
If you’re cooking a delicate protein like fish or tofu, you want a low simmer around 180°F–185°F. Too much bubble activity can break fish apart or cause tofu to crumble. The same goes for dumplings simmering in broth — if you’re making something like Chinese dumplings, too vigorous a simmer can tear the wrappers.
If you’re making a thick stew or chili, the simmering behavior looks different than in a thin broth. Thick liquids don’t bubble the same way — they tend to “blurp” and spit rather than form classic bubbles. That’s because the viscosity traps steam below the surface, which then bursts through in big, slow pops. For thick stews, use a lower heat setting than you’d think, stir more often, and keep a lid partially on to prevent the bottom from scorching.
⚠️ Warning: When simmering anything thick like tomato sauce, chili, or congee, the bottom of the pot can scorch even at the correct temperature. Stir every 10 to 15 minutes and use a heavy-bottomed pot to distribute heat evenly. A burnt layer on the bottom will send a bitter, acrid taste through the whole dish.
How to Bring Something to a Simmer (Step by Step)
This might seem obvious, but there’s a method that gives you the best results consistently.
Start on high heat. Whether you’re bringing water, stock, or a sauce up to temperature, there’s no advantage to starting low. Use high heat to get the liquid hot quickly.
Watch as it approaches the boil. You’ll see small bubbles start to form on the bottom of the pot and rise. This is the pre-simmer stage. The liquid is between 170°F and 190°F.
Turn the heat down before it reaches a full boil. This is the step most people skip. They wait until it’s at a full, rolling boil and then turn it down, but now you’re fighting momentum — especially on electric stoves that hold residual heat. Drop the heat to low or medium-low when you see the first signs of gentle bubbling.
Give it two minutes to settle. Don’t keep fiddling with the dial. Let the pot settle into its new equilibrium. After a couple of minutes, check the bubble activity and adjust up or down in small increments.
Leave it mostly alone. Once you’ve hit the simmer, resist the urge to crank the heat up “just a little.” Simmering is a patient technique. Let it do its thing.
Common Simmering Problems and Quick Fixes
Even once you understand the concept, real-life cooking throws curveballs. Here are a few issues people run into.
The simmer keeps creeping up to a boil. This usually happens on electric stoves or when cooking with a lid on. Solution: crack the lid open slightly, or switch to a lower heat setting. You can also move the pot so it’s slightly off-center on the burner, which reduces direct heat.
The simmer dies out and the liquid goes still. You’ve gone too low. Bump the heat up a tiny bit and give it a minute. On gas stoves, you might have the flame so low it’s barely on — make sure it hasn’t gone out entirely. (A flame that blows out can release gas without burning it, which is a safety hazard.)
One side of the pot simmers harder than the other. This is common with burners that have uneven heat distribution, especially on older electric coils. Rotate the pot every 20 minutes, or switch to a burner that you know heats evenly. Using a heat diffuser — a flat metal disc that sits between the burner and the pot — can also even things out.
The liquid is simmering but the food isn’t cooking through. This can happen at high altitudes where water simmers and even boils at lower temperatures. Because the water is cooler than it would be at sea level, food takes longer to cook. Add extra time, not extra heat. Cranking up the temperature just brings you to a boil faster — it doesn’t actually make the liquid hotter once it’s already boiling.
Food Safety and Simmering
Simmering plays a real role in food safety, especially with meats and stocks.
⚠️ Food safety note: The USDA recommends cooking most meats to an internal temperature of at least 145°F to 165°F, depending on the type of meat. Simmering liquid is well above those temperatures (180°F–205°F), so food simmering in liquid will eventually reach safe internal temperatures — but it takes time. Always use an instant-read meat thermometer to verify doneness for meats, especially poultry and pork. Don’t rely on simmering time alone.
If you’re making a large pot of stock or soup and plan to store it, cool it down quickly rather than letting it sit at room temperature. The USDA’s danger zone for bacterial growth is 40°F to 140°F (4°C to 60°C). Get your simmered foods into the refrigerator within two hours. For tips on safe storage of cooked foods, check out this guide on how long cooked rice lasts in the fridge — the same two-hour rule applies to pretty much anything you’ve cooked.
FAQ
What number on the stove is a simmer?
On most stoves with dials that go from 1 to 10, a simmer falls between 2 and 4, depending on the stove type and what you’re cooking. Gas stoves tend to simmer well around 2–3, while electric stoves often need a slightly higher setting (3–4) because they cycle on and off rather than providing continuous heat. The best approach is to adjust by sight — look for gentle, steady bubbles rather than relying on a specific number.
Is simmering with the lid on or off?
It depends on the dish. Cooking with the lid on traps steam and keeps the temperature higher, which can push a simmer into a boil if you’re not careful. It also prevents evaporation, so it’s good when you want to keep liquid levels constant (like cooking rice or braising). Cooking with the lid off allows steam to escape, which keeps the temperature slightly lower and helps reduce and concentrate sauces. Many recipes call for a lid that’s slightly ajar as a middle ground.
Can you simmer on medium heat?
You can, but it depends on your stove and your pot. On some stoves, medium heat produces a solid simmer. On others, medium is hot enough to bring liquid to a full boil, especially in a thin, lightweight pot. Start at medium if you like, but watch the pot closely and turn it down if the bubbling becomes too aggressive. Most cooks find that medium-low is a more reliable starting point for simmering.
What happens if you boil instead of simmer?
Boiling when a recipe calls for simmering can cause several problems. Meats become tough and dry because the high heat squeezes out moisture faster than connective tissue can break down. Sauces reduce too fast and can burn on the bottom. Stocks turn cloudy because fats emulsify into the liquid. Delicate ingredients like fish, dumplings, or tofu can fall apart. And volatile flavor compounds evaporate off, leaving food that tastes flat.
How long can you leave something simmering?
Technically, you can simmer for hours — and many recipes require it. Bone broth simmers for 12 to 24 hours. Stews and braises might go for 3 to 4 hours. The key is maintaining a steady, gentle simmer the entire time, checking the liquid level periodically and adding more if it drops too low. Never leave a simmering pot completely unattended for long stretches, especially on a gas stove where the flame could be blown out by a draft.
Your Simmer, Sorted
Now you know that a simmer sits between 180°F and 205°F, you know what it looks like (gentle bubbles, quiet surface, soft wisps of steam), and you know how to get there on your particular stove. The single best thing you can do is practice. Next time you’re making a soup, a sauce, or even just cooking a pot of rice, pay attention to the bubbles. Adjust the heat. Watch what happens.
Once you can hold a steady simmer without thinking about it, you’ll notice your food just tastes better. Soups will have deeper flavor. Meats will be more tender. Sauces will be smoother. It’s one of those foundational skills that quietly makes everything else in the kitchen easier — and unlike a lot of cooking techniques, it doesn’t require any special equipment. Just a pot, a burner, and a little patience.